Friday, July 29, 2005

infused vodka


in readiness for the upcoming san francisco summer (which as we all know comes in the late summer, once the giant fog bank relents a little) my mind has turned to booze. well, to be frank, my mind is always on booze. wine, bourbon, pernod, limoncello, pimms, raki, sake, shoju. i've never met a drink i didn't like, with the possible exception of fernet, which i can choke down for digestive purposes only. oh, and also on my not-to-drink list is something called "mescalito". not to be mistaken for mescal, mescalito is a brand name of an alcohol you can buy in liquor stores in mexico - it is positioned on the shelf between the lowest grade of mescal and the rubbing alcohol, i kid you not. it is basically cane alcohol and while it tastes just fine with some ice and fresca (and is dirt cheap at two bucks a litre), it will cross your eyes after the first four sips.

so, as i was saying, in readiness for the rolling back of the fog, i've been infusing vodka. i got the idea shortly after i shelled out twenty five bucks for some absolute citron. the great thing about brewing your own is that you can make any flavor you want, as strong as you want it, as sweet or unsweet as you like, and you can use the trader joe's nine dollar and ninety nine cent bottle of fake polish vodka (made in austria, i think) and it will taste fantastic.

and it is so easy. just buy a bottle of vodka, select your flavor, remove a little of the spirit from the bottle, shove the zest (for citrus), or the fruit, or the herbs, or the vegetables into the bottle and wait anywhere from one day to a week, shaking it occasionally and tasting. when it's reached the desired intensity level, remove the vodka-preserved stuff to the trash can and strain the liquor from any particulate. that's it. couldn't be easier.


pictured here are, from left to right: lychee, cucumber, lemon and mango. these guys taste soooo good over ice with some sparkling mineral water, and the cucumber makes a most interesting martini. if anyone out there has any ideas for more flavors or mixed drinks using this stuff, please post....

Tuesday, July 26, 2005

yes, you CAN make your own tempeh!

the soybean, how many ways i eat thee. as milk on my cereal, in creamy bricks of pressed tofu, dry roasted with salt, fermented as miso and soy sauce, whipped up with peanut butter, chocolate and banana and pressed into a graham cracker crust, incorporated into various sauces and dressings and smoothies, as hotdogs, burgers and even, gasp "cheese", your discarded hulls otherwise known as okara added to breads or formed into patties. but never, ever as natto. that's taking things a little too far for me.

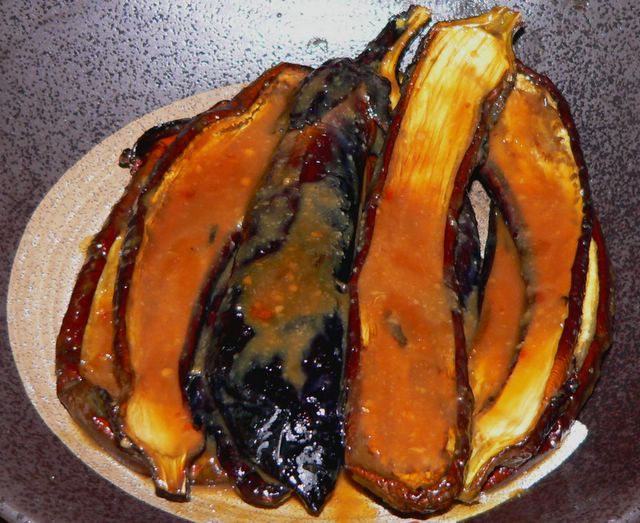
oh yes, did i mention tempeh? this indonesian soyfood is loaded with good stuff and is darn tasty too. you can cook it about a million different ways but the way i like it best is simple. salted and quickly pan-fried. i began making my tempeh several years ago while living in a little town in northern mexico where tempeh was nowhere to be found. soybeans yes. ziplock baggies yes. vinegar yes. on a trip back to the us i ordered the culture and thus began my love hate relationship with homemade tempeh. love the taste and the price. hate the splitting and dehulling. if you're a tempeh fan or just a closet science freak, i highly recommend you try making your own at least once. the taste is just not comparable to store-bought, in my humble, cheap-skate opinion.

the materials:
a large towel
2 1/2 cups dried soybeans
tempeh starter, 1 teaspoon
white vinegar, 2 Tablespoons
2 ziplock sandwich bags
safety pin
dishtowels
cookie sheet
incubator

the beans: use dried, whole soybeans that have been soaked for at least 6 hours to overnight. 2 1/2 cups dried soybeans will yield approximately two ziplock sandwich bags of tempeh. i generally make a double batch of tempeh and freeze for later use.

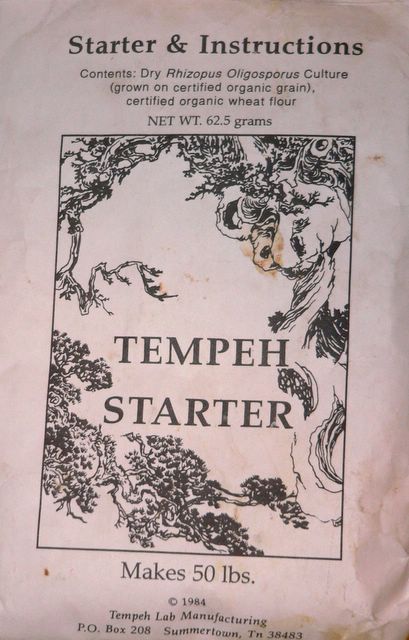
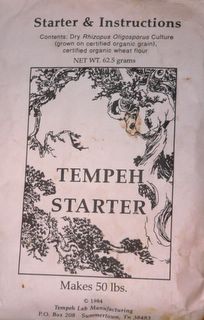
the starter: you can buy the starter online from any number of sources. i ordered mine through G.E.M. Cultures, located in northern california. you can get enough culture to make 18 lbs. of tempeh for about four dollars. it seems to last indefinitly if stored in a ziplock bag in the refrigerator...i've had mine for about three years now and it still keeps cranking out the tasty fungi.

the incubator: there are several crazy makeshift incubator ideas out there, the most rambshackle of which includes a styrofoam cooler with string of christmas lights blazing inside, lid slightly ajar. i use my gas oven. the pilot light keeps it warm inside and to regulate the temperature i jam a rolled up washcloth in the door, keeping it slightly ajar. in an electric oven i've used a low wattage cheapo desk lamp pluged in with the light source pointing up and away from the tempeh and the wadded up washcloth for temperature regulation. the point is that you want to maintain a temperature of about 30-32 c, about 80 degrees f. it's important to make sure your incubator is not airtight and to make sure you do a trial run in your incubator with just your thermometer first. as the tempeh culture grows it will begin to generate it's own heat and the opening of the oven door may need to be adjusted.

the baggies: stab a bunch of holes into your ziplock sandwich bags with the sterilized safety pin. at least 1 hole every 1/4 inch in a grid pattern.

the procedure:
1. soak the dried soybeans for 6-24 hours.

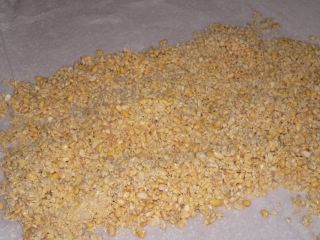
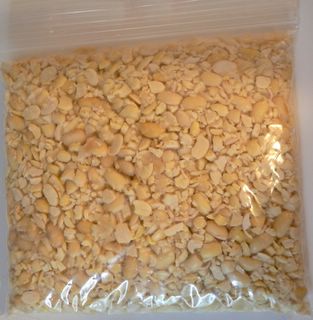
2. split the soaked soybeans. this is the fun (as in getting stabbed in the eye fun) part. ideally each bean will be split into two halves. some suggest kneading the beans between your two hands to split the beans (never works for me), some suggest using a rolling pin or straight edged glass to apply pressure in a rocking motion over a thin layer of the beans (works okay but it a giant pain and makes a mess), some lucky souls have a grain mill which they set on a loose setting and split the beans when dry, some use a food processor to lightly split the soybeans. i generally use a straight edged glass and do the rocking motion thing until i get bored, then dump the remaining beans a tiny bit at a time into a food processor.


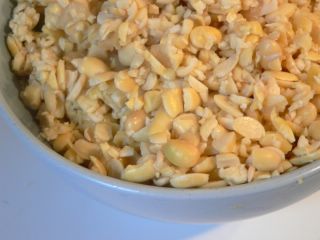
3. cook and dehull the broken soybeans. bring a large pot of water to boil and add the soybeans. as the water boils skim off the hulls that float to the top and discard. simmer for about 20 minutes, removing as much of the skin as possible but not stressing over any laggers.

4. dry the skinless, broken, naked soybeans. this is where the big beach towel that your grandma gave to you comes in. unfurl that sucker and place the drained beans in a thin layer on it. roll it up like a burrito. unroll and place the dry-ish beans into a large mixing bowl. it's important to get these beans pretty dry because too much moisture may cause a batch to go bad.


5. innoculate. once the beans come to slightly less than skin temperature add and thoroughly mix the vinegar. once incorporated, add the starter and again thorougly mix.


6. bag and incubate. pack one half of the tempeh into one prepared ziplock sandwich bag, trying to pat it down as flat as possible and fill out all the corners so you have a solid cake. on your cookie sheet place the dishtowels about 2-3 layers thick. lay the packaged tempeh on top and place in your incubator.


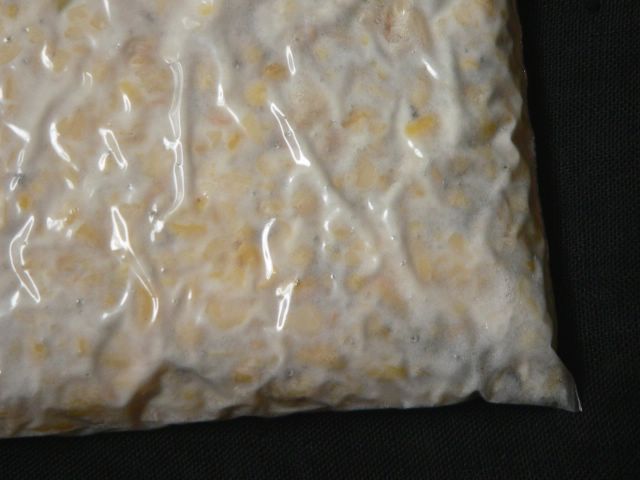
7. watch and wait. this is the really fun part. nothing will happen for the first twelve hours so don't be disappointed. by about hour 15-20 you will begin to see white stuff growing in there. don't panic, this is good. by about hour 24 the cake should have a nice white tightly knit covering of white stuff with some black patches in the edges and around the little holes in the baggies. don't panic. this is also good. the black stuff is just a part of the lifecycle (sporulation) of the culture. although unsightly, i find the flavor better with more of the black stuff...it's a little stronger. minimally the tempeh should tightly bound with white stuff and hold its shape when sliced.

after 24 hours. there are some black spots around the airholes and in the edges. this is good!


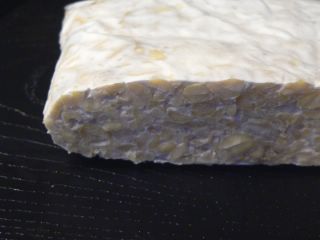
the sliced cake should be tightly bound with white stuff and hold its shape well.

8. finishing.when it's done as you like it remove from the incubator. i always steam the cakes for 20 minutes immediately and freeze for later use. the tempeh should have a nice, mushroomy smell. if it's slimy or smells heavily of ammonia then it's probably bad and should be discarded. any color other than white or grey or black is not good.

for more instructions on tempeh making: click here and click here.
for the more information on tempeh (history, etc.), click here.

Wednesday, July 20, 2005

temaki, the lazy cook's sushi

i've been on a japanese food kick lately, if you haven't noticed. these mini obsessions seem to come and go in waves. i usually can tell i'm on the tail end of this particular one when i make sushi, which i've never really been crazy about. when i say sushi i'm usually referring to maki, the seaweed wrapped rolls that are stuffed with the usual suspects in the usual combinations in the usual limp seaweed skins. while they're not particularly difficult to roll and slice there is just something so mundane about them. they've never really turned my crank. and then i discovered temaki, or "roll your own" sushi.

and this is how it works: you cook up the "usual suspects" and some unusual ones for the filling, cutting them about the length of a halved seaweed wrapper, season some rice, lay out some condiments, toast the seaweed sheets and, as i mentioned before, cut them in half, and serve. not only is it more fun for everyone to make their own little japanese burritos, getting wacky with crazy, unpalatable combinations for which they have no one to blame but themselves, but it's also fun to watch the, um, unusual shapes that emerge: cigars, snow cones (sometimes), ambulance stretchers, anna nicole smith before the diet, you name it.


in the platter pictured above i have some seasoned shitake mushrooms, blanched carrots, shiso leaf (try this, it is so interesting and good!), avocado, fake meat, daikon sprouts, slivered green onion, seaweed salad, pickled ginger. not pictured but some other things i frequently use are green bean or asparagus tempura, cucumber and seasoned omlette.


and here we have some hamachi and tuna for the flesh eaters.

sorry for the blurry picture. too much sake.

to assemble, lay the halved sheet flat on a plate with the long part horizontal, spoon rice in the 1/3 left part, lay in your fillings and roll in a snow cone shape with bottom edges meeing and top fanning out into a triangle. your first few attempts may result in something more geometrically, um, interesting. and the best part is that you can take your leftover fillings (barring such items as avocado and fish), diced them up and mix with the leftover rice for your next meal. easy, no?

sushi rice seasoning
4 Tablespoons rice wine vinegar
2 Tablespoons +1 teaspoon sugar
1 teaspoon salt

this makes enough seasoning for about two cups (if using a regular measuring cup, 3 cups if using cup measure that come with your rice cooker) of uncooked, short grain rice. mix the ingredients together and slowly pour over cooked rice. fan the rice with one hand (the help the steam escape) while gently folding the seasoning in with the other. lightly toast seaweed sheets over a stove burner on each side and cut in half with kitchen shears.

Monday, July 18, 2005

ichiban kan!

aren't i cute? clearly i come from japan where cute is the ultimate fetish. you can't see below my neck but i am wearing a school girl's uniform. it is very short. luckily i have some very scrunchy socks-tsu on my feet that pool around my calves and ankles, thus protecting my modesty whilst at the same time making me look very, very cute. nevermind that it is one hundred and four degrees outside right now. my name is otsu-chan. please take a bite....


ichiban kan, the dollar store of my dreams. i keep on going back, filling my house up with more, hmmm, let's be honest about this, junk. i dread the inevitable day that i move apartments yet again. i will have to go through my closets and cupboards, sifting through this stuff, wasting hours gloating over my useless bargains.

if you don't know about this junkers' haven, it is called ichiban kan, located in the peace plaza building on post street next to the sumitomo bank. it is a .99 cent store, sort of. this doesn't mean that everything costs .99 cents, like at the ".99 cent only" store, not to be mistaken for the ".99 cent and up" store, or god forbid, the "1.00 and up store". no my friends, it simply means that things are cheap.

filled with bargain-priced goodies such as instant miso soup, rice crackers, a dazzling selection of pocky (most recently added: "pocky for men"), house slippers, every imaginable type and size of plastic storage box, cute glasses, bits of japanese pottery, a huge stationary section, this place is paradise for the junk shopper. and the cute hunter as well. there is more cute in here than in both pigtails of aforementioned japanese schoolgirl.

i mean, just look at these onegiri molds. i am useless at making uniform rice balls that hold together, my graceless leaden hands forming instantly crumbling sandstone boulders instead. but look ma, now i can whip them out nice and tightly packed. and cute too.


ichi ban kan
22 peace plaza (western wing of kintetsu mall)
san francisco

Monday, July 11, 2005

jam and cookies


for the past five years or so i've noticed a steadily growing urge to put a little something up in my larder. please remove mind from gutter. i am speaking of canning. spelled with two of the letter n, not one. it must be related to the ticking of the biological clock, the drying up of the eggs, the autumnal fading of this chickenhood, or maybe just watching too much little house on the prarie as a young girl.

so, as you can see, this year i did it. and am still doing it. in fact, i have become obsessed with it. i've banged out apricot jam, peach jam, apricot peach jam, apricot ginger jam, apricot chutney (do i like chutney? i don't know), dill pickles (they came out mushy due to the hotwater bath processing, yuck), pickled beets (amazingly tasty when a 1/2 of very thin slice of lemon is added to the jar), preserved lemons (an utter failure - none of the jars sealed). and it is fun. kinda. the problem is that i don't really use jam. and i don't like those mushy dills. and chutney? i seem to recall trying it once and hating it.

don't get me wrong, the jams are amazingly delicious - i picked the damn fruit right off the trees at u-pick orchards in brentwood, like the hot sweaty clumsy monkey i am i dangled from thorny tree branches (verboten, by the way) dropping my little nuggets down to the waiting hands of my moms, who promptly hurled them with the delicacy and finesse of a major league pitcher into a waiting bucket twenty feet away.


so loaded with jam i went in search of recipes. the man was clamoring for something sweet and i put two and two together and got, um, cookies. jam thumbprint cookies.

the original recipe calls for all butter but he likes it better with a butter shortning mix. they are pretty, simple to make, not too sweet, soft and kinda shortbread-y but not quite.

jam thumbprint cookies
3/4 cup butter, softened (i use 6 T. butter 6 T. shortening)
1/2 cup sugar
2 egg yolks
1 3/4 cups all-purpose flour
1/2 cup fruit preserves, any flavor
1 teaspoon vanilla (optional)

cream together butter, sugar and egg yolk. add flour in until a dough forms. roll the dough out into 1 inch balls and place onto ungreased cookie sheet. using a finger poke a little well into the center of each cookie and fill with jam. bake for 8 to 10 minutes until golden brown on the bottom. cool on racks. eat.

Thursday, July 07, 2005

japanese potato salad


hope you all had a good fourth of july weekend, or canada day, or regular ol' workday or weekend day, whichever it was. for five days i gorged myself on such delicacies as ruffles potato chips, tortilla chips and guacamole, veggie burgers, "veggie" sandwiches consisting of ruffles, tomato, onion and guacamole and the occasional iceberg lettuce shred, lots of beer and no small amount of desserts. near the end of this five day pure junk (otherwise known as vegetarian trying to fill up at meat-eaters bbq) binge i felt like i was going to blow up just like a fourth of july firework. in point of fact i did, but not quite (although almost) as colorfully, and not in public but rather in the privacy of my own privvy. too much information, no?

so in honor of this very american holiday i offer you a japanese rendition of a classic american favorite. potato salad, japanese-style.

Japanese-style Potato Salad
1 lb. potatoes (about 4 medium-large potatoes)
1 english or japanese cucumber (see directions)
1 T.+ finely sliced green onion, green and white part
1 teaspoon dijon mustard
2 T. mayo (for vegan use vegannaise or a homemade tofu mayo - for lowfat substitute soymilk or even water though this will affect the texture)
2 t. lemon
Salt and black pepper to taste

boil the unpeeled potatoes. while the potatoes are cooking, prepare the cucumber...if using japanese or hothouse english cucumbers you may peel some of the skin, leaving strips of green, and slice very thinly. if using the larger, more pornographic waxy variety, you'll probably have to peel it, slice it in half lengthwise, scoop out the seeds and then slice very thinly. place the sliced cucumber into a small bowl, adding about one teaspoon of salt and toss. this is to expel some of the water so as not to make your salad, ugh, watery. thinly slice the green onion and set aside. once the potatoes are soft, remove the skins and mash. i use a potato ricer. if you like some chunks you can mash some of the potatoes and cube the rest. i prefer it smooth, like the back of a hairless man. rinse the salted cucumber with water and squeeze. place the potatoes, cucumber and onion, mayo, lemon juice and mustard in a bowl and mix together. add lemon, salt and pepper to taste, garnishing with more green onion.

Friday, July 01, 2005

eggplant misoyaki


'tis the season for japanese eggplant. so pretty. so meltingly tender. and served with this sweet-ish miso sauce, so very tasty. this sauce can be served over just about any vegetable. i like it with green beans, asparagus, even tofu, the fried, seared and raw varieties. try it, you'll see what i'm talking about. so without further adieu, here it is, for you good time sentimental happy taste memory.

eggplant misoyaki
5-6 small japanese eggplants
1 Tablespoon sugar
2 Tablespoons mirin
1 Tablespoon sake
1-4 Tablespoons dashi
2 1/2 Tablespoons light miso (smaller amount if using a darker, saltier miso)
sesame seed oil

you can prepare the eggplant in one of two ways: either grilled/broiled or cut into rings and sauteed. if you want to retain the shape of the eggplant, as pictured, cut each eggplant in half, brush with sesame seed oil, and broil or grill until tender. while the eggplant is grilling prepare the sauce.

if you choose not to broil/grill the eggplant simply cut into one inch rings. you may also make this dish using the larger variety (globe) of eggplant but be sure to peel most of the skin off, cut into 1 inch cubes, salt and drain in a colander, rinsing before cooking. this is important unless you (1) like a salt lick, or (2) seeking a high blood pressure related heart attack, or (3) really want to bloat up until you can't button up your pants. heat a frying pan and add 1-2 Tablespoons sesame seed oil. add eggplant and saute until tender, adding a bit of water now and then if necessary. when i am feeling gross and in need of avoiding oil, i "steam fry" my eggplant with small additions of water now and then.

mix the sugar, mirin, sake, miso and dashi (or water) together in a small bowl and add directly to the frying pan. continue cooking until the sauce thickens slightly. remove from heat and serve.

if you've broiled your eggplant, place the sauce ingredients in a small sauce pan and heat until boiling. simmer for just a few minutes until the sauce thickens slightly and carmelizes a bit. remove from heat and pour over prepared eggplants.

garnish with minced green onion for extra prettiness.
Site Meter

«#Veggie Blogs?»